1. Purpose
To help restaurant manager set up restaurant layout and service area to make reservation, take order, check out customer, etc.
2. Instruction steps
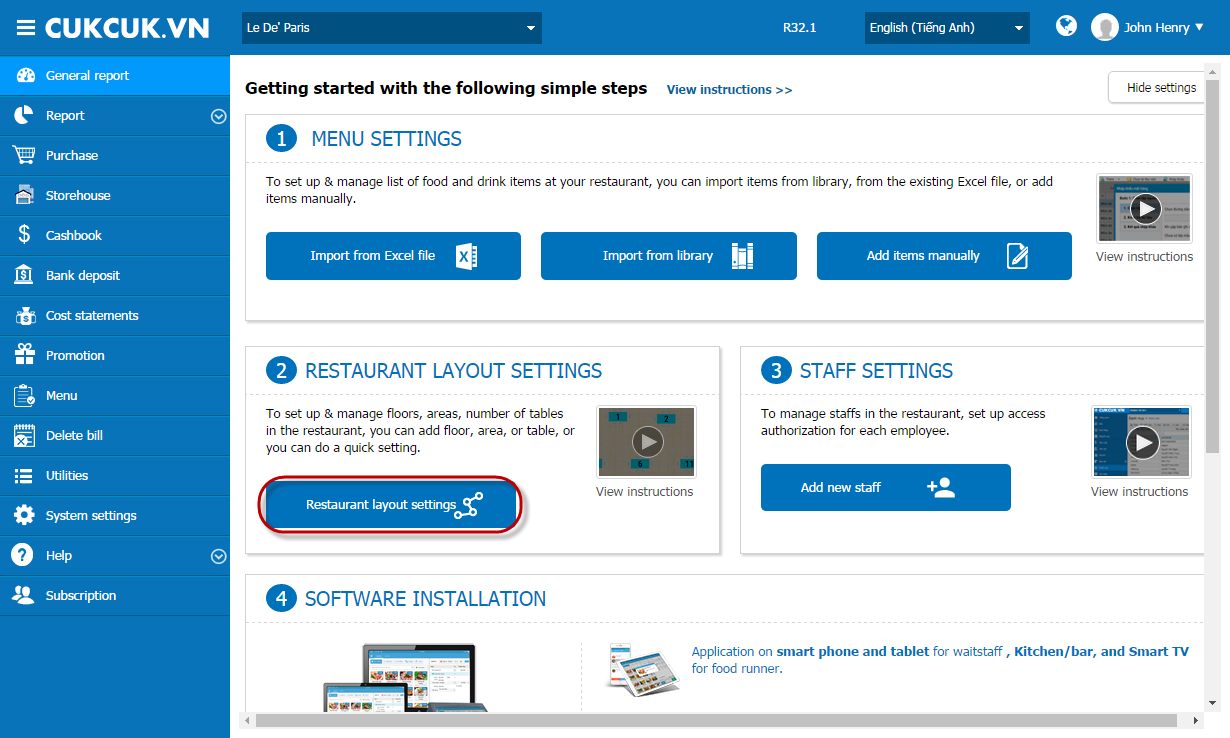
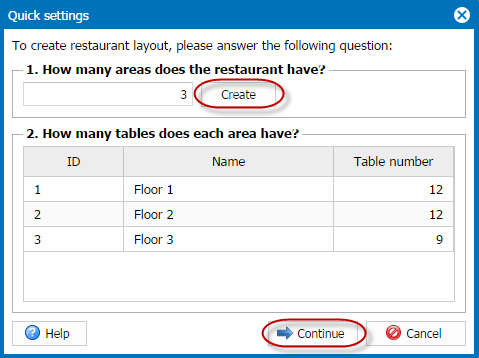
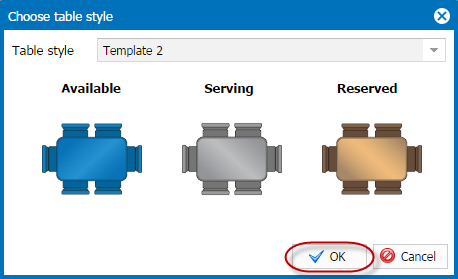
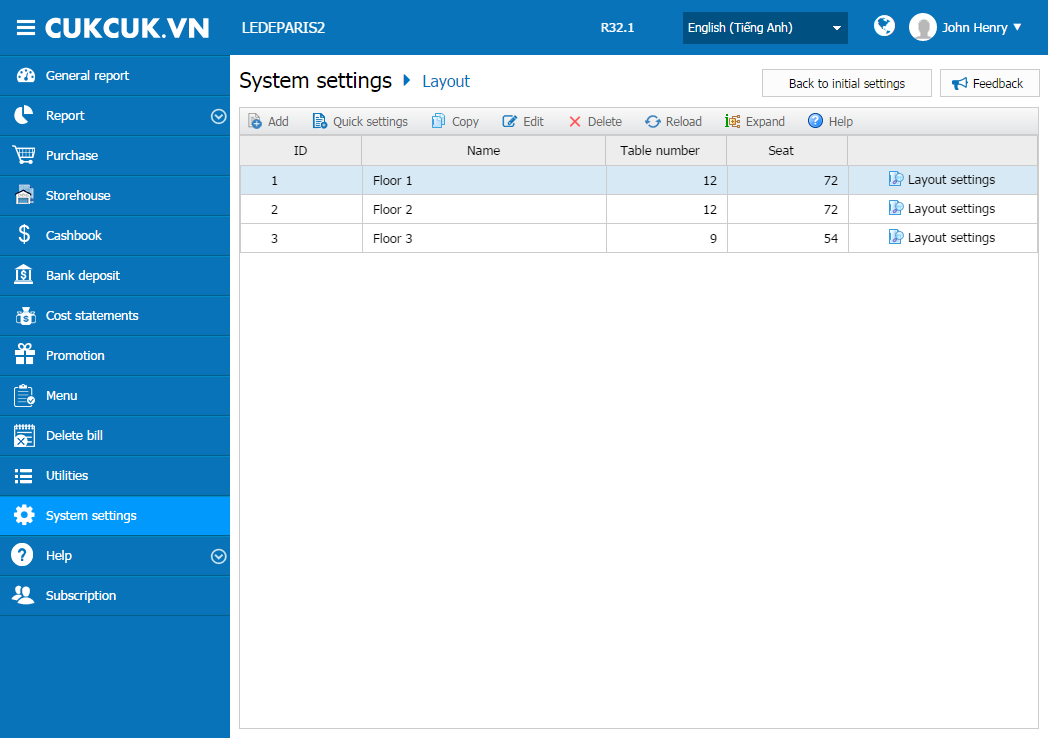
To set up restaurant layout, proceed as following: ❖ Step 1: Create areas 1. At Layout settings in getting started screen, select Restaurant layout settings. 2. Enter the number of service areas in your restaurant. 3. Select Create. 4. Edit ID and area name as you want. 5. Enter quantity of tables in each area. 6. Select Next. 6. Select Table Type. 7. Select OK, the areas you just created will appear as following.
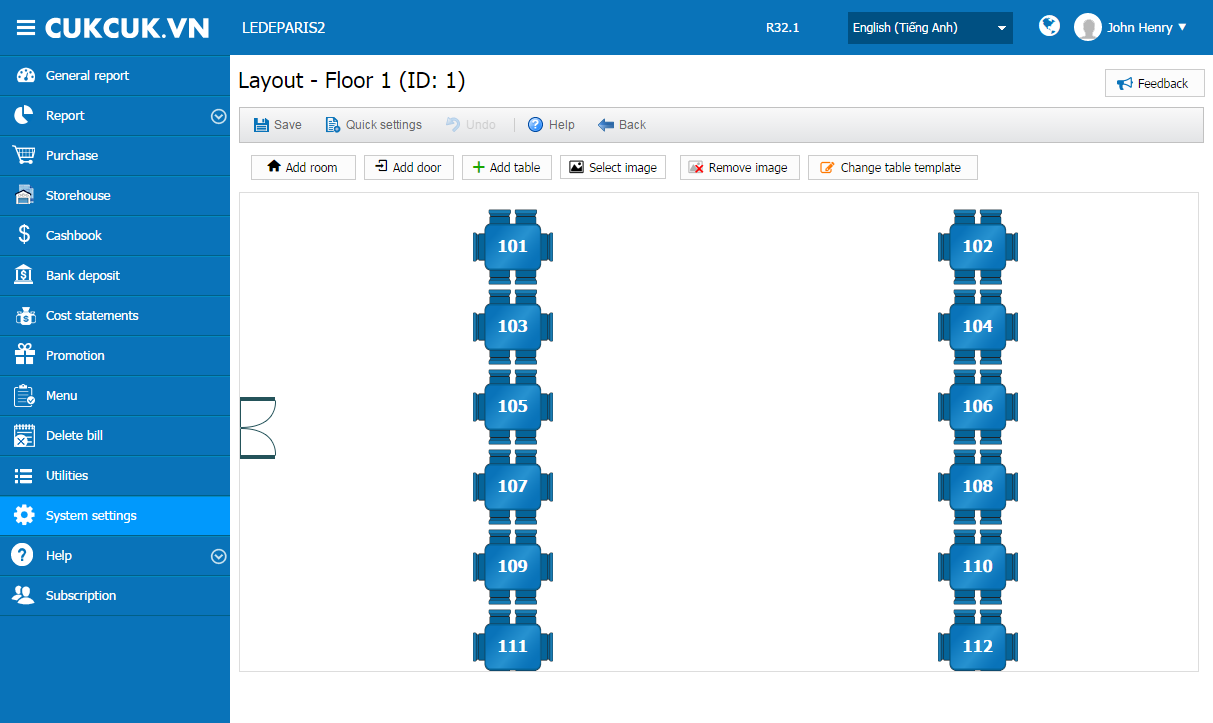
❖ Step 2: Set up layout 1. At the area you need to set up, select Layout settings.
2. Set up restaurant layout as actual layout in reality.
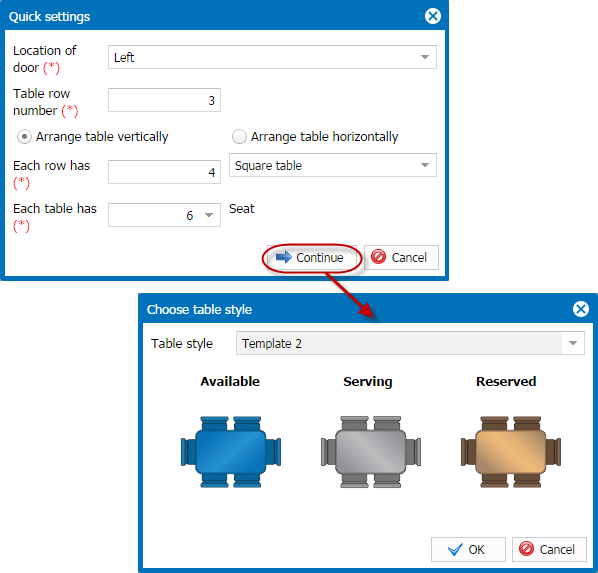
Method 1: Select feature Quick settings.
Method 2: Use your mouse to drag and drop tables and doors on the layout.
Place your mouse on the table (or door) to turn the cursor into a 4-direction arrow.
Press and hold left mouse button and drag table (or door) to the location you want.
Press right mouse button and select the suitable fuction to set up table (or door).
You can also: Add room, Add door, Add table on menu bar to set up layout to be the same as your actual restaurant layout.
Select Change table type to select table type for the area.
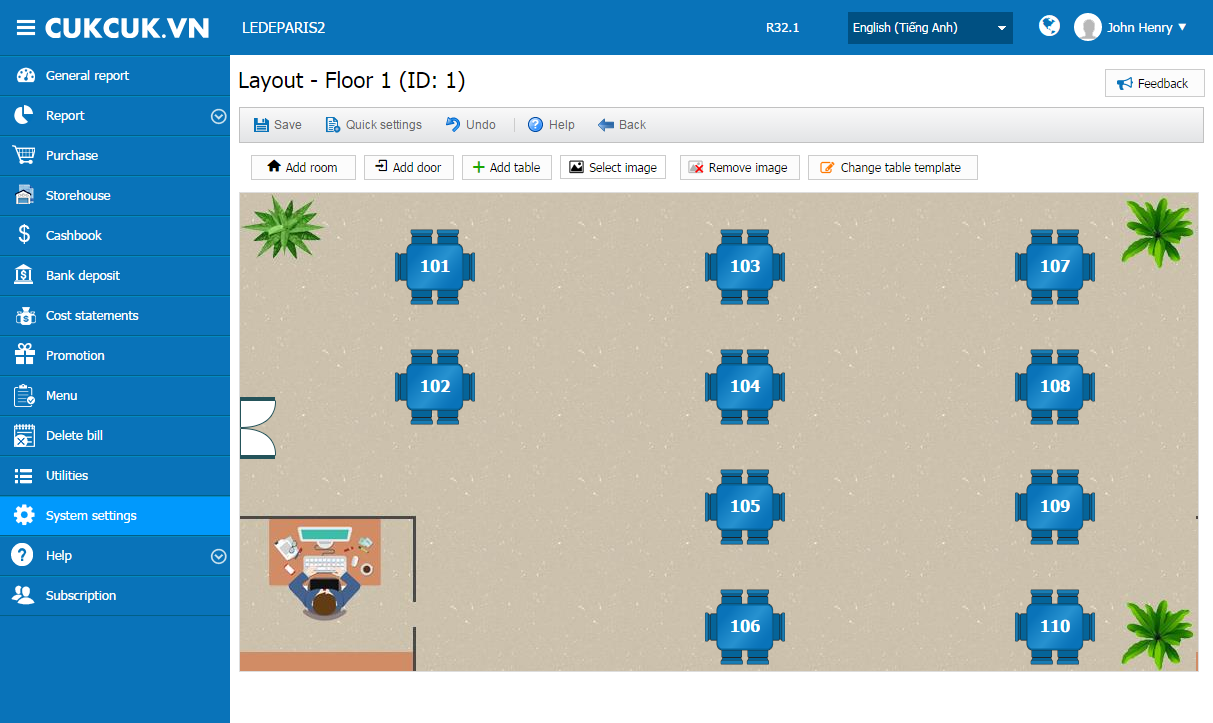
And you can select background image for the layout so that it's will be easier for your employee to arrange table for customer: press Select background image to upload image.
3. Select Save.
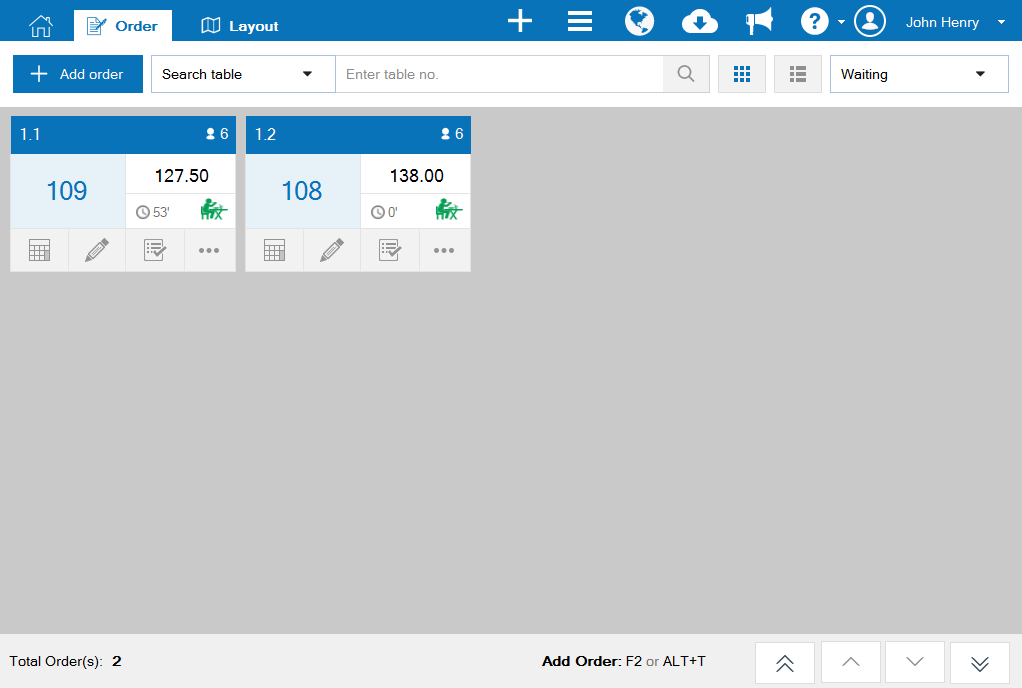
After you finished, information of table will be displayed on the order as following:
3. Note
1. If you already finished Menu settings, to open Getting started screen, on Menu, restaurant manager can select Back to initial settings or select General report and select Display settings.
2. After beginning to use the software, you can edit restaurant payout by going to Settings\Layout.